How to Integrate a Register with a PIN pad
Merchants using a Cash Register application can use a Dejavoo payment terminal as a PIN pad to process transactions securely. This integration allows merchants to initiate transactions from the Register and complete payments on the PIN pad through SPIn (Secure Payment Interface). This document explains how to configure and enable this integration on the iPOSpays Portal.
Feature Compatibility
-
Supported Processors: Supported by all processors
-
Supported Fee Types: Supported all Fee Types
-
Supported Terminals (PIN pad):
-
Android P Line Terminals: P1, P3, P5, P8, P12, P17
-
Android QD Line Terminals: QD2, QD3, Q3Pro, Q3mini, QD4, QD5
-
Steps to Integrate a Register with a PIN pad
Step 1: Log In to iPOSpays Portal
Log in to the iPOSpays Portal using your ISO credentials.
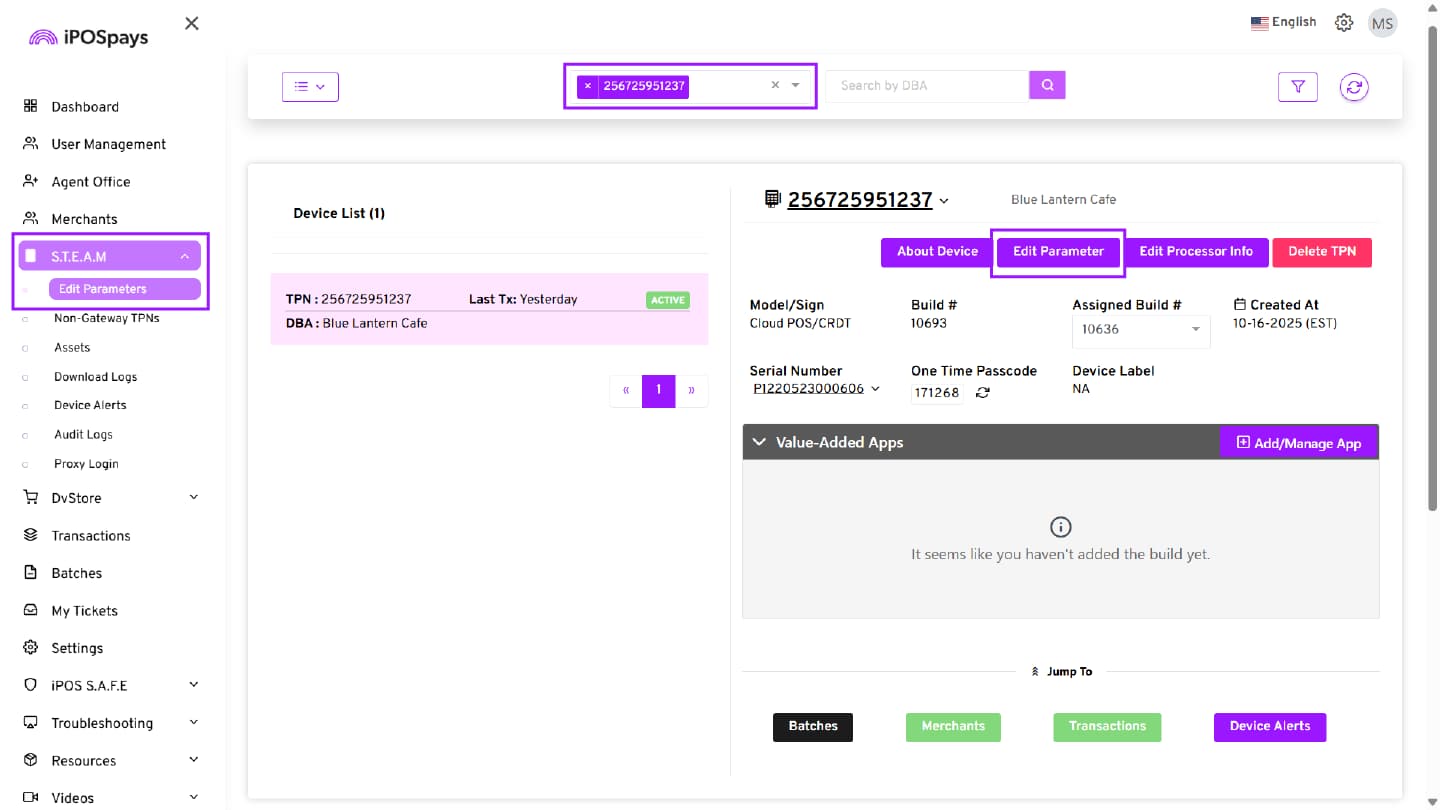
Step 2: Locate the TPN
-
From the side menu, click S.T.E.A.M → Edit Parameters.
-
Search for the TPN you want to enable PIN pad integration.
-
Click Edit Parameter.
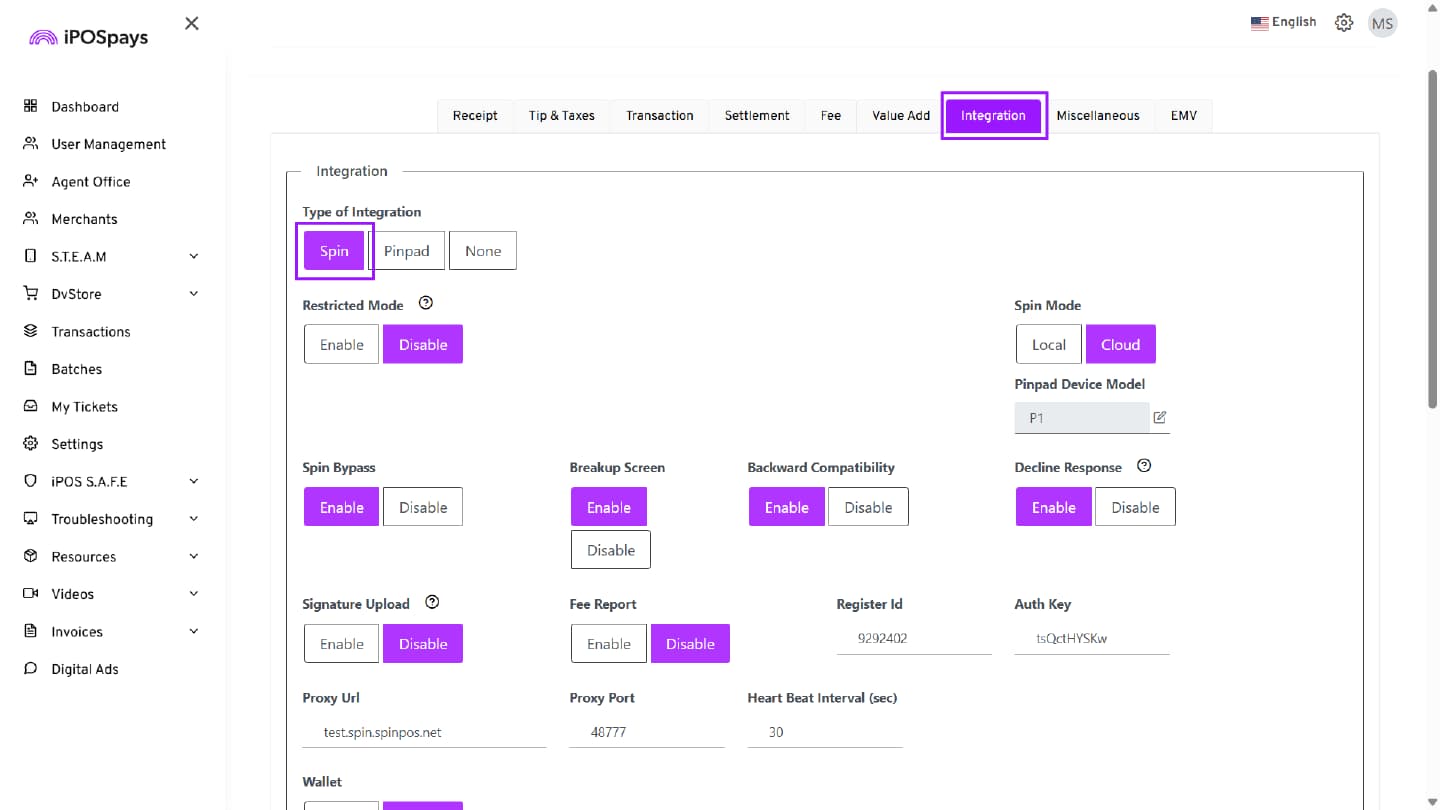
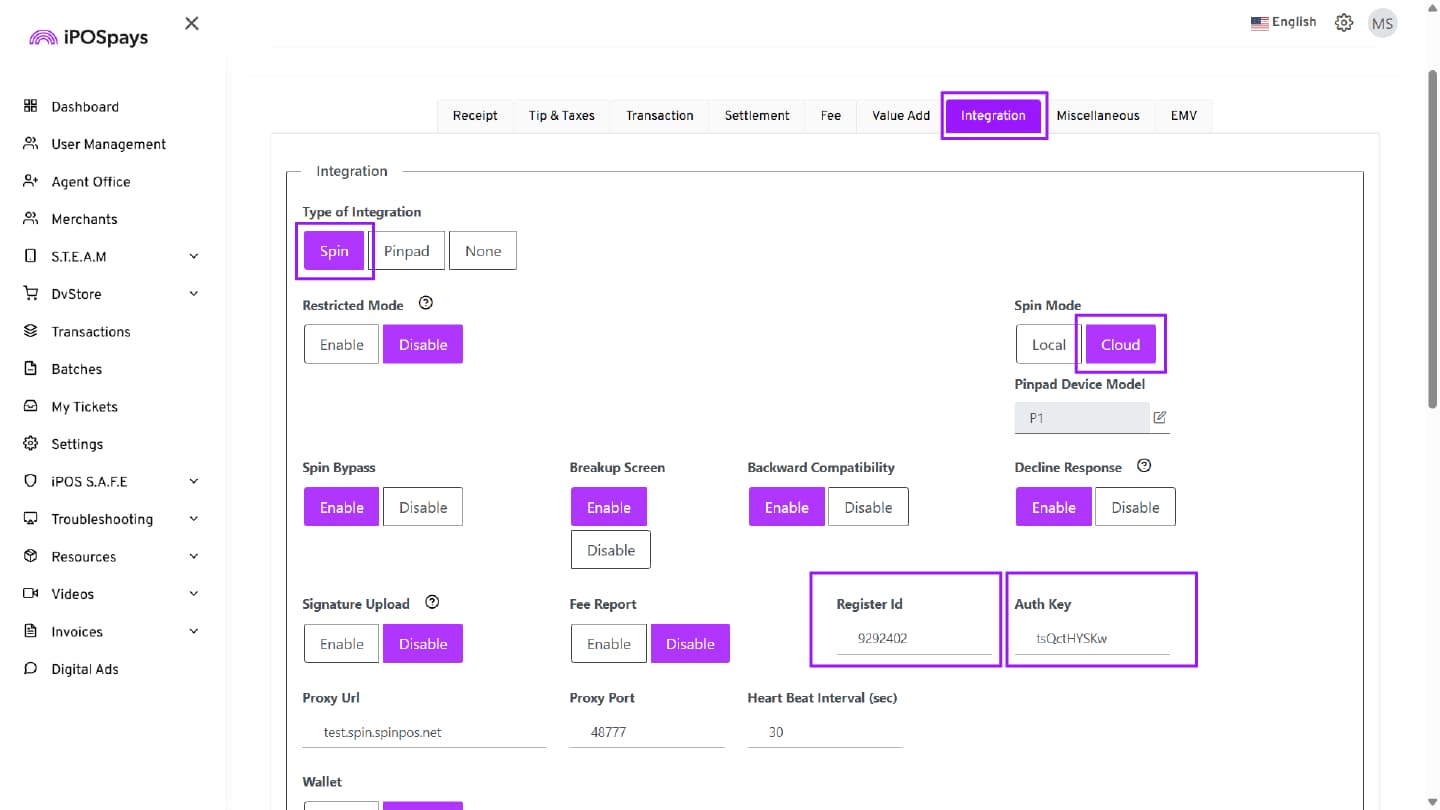
Step 3: Configure Integration Settings
-
Click Integration.
-
In the Type of Integration field, select SPIn.
-
Choose the required SPIn Mode:
-
SPIn Local
-
SPIn Cloud
-
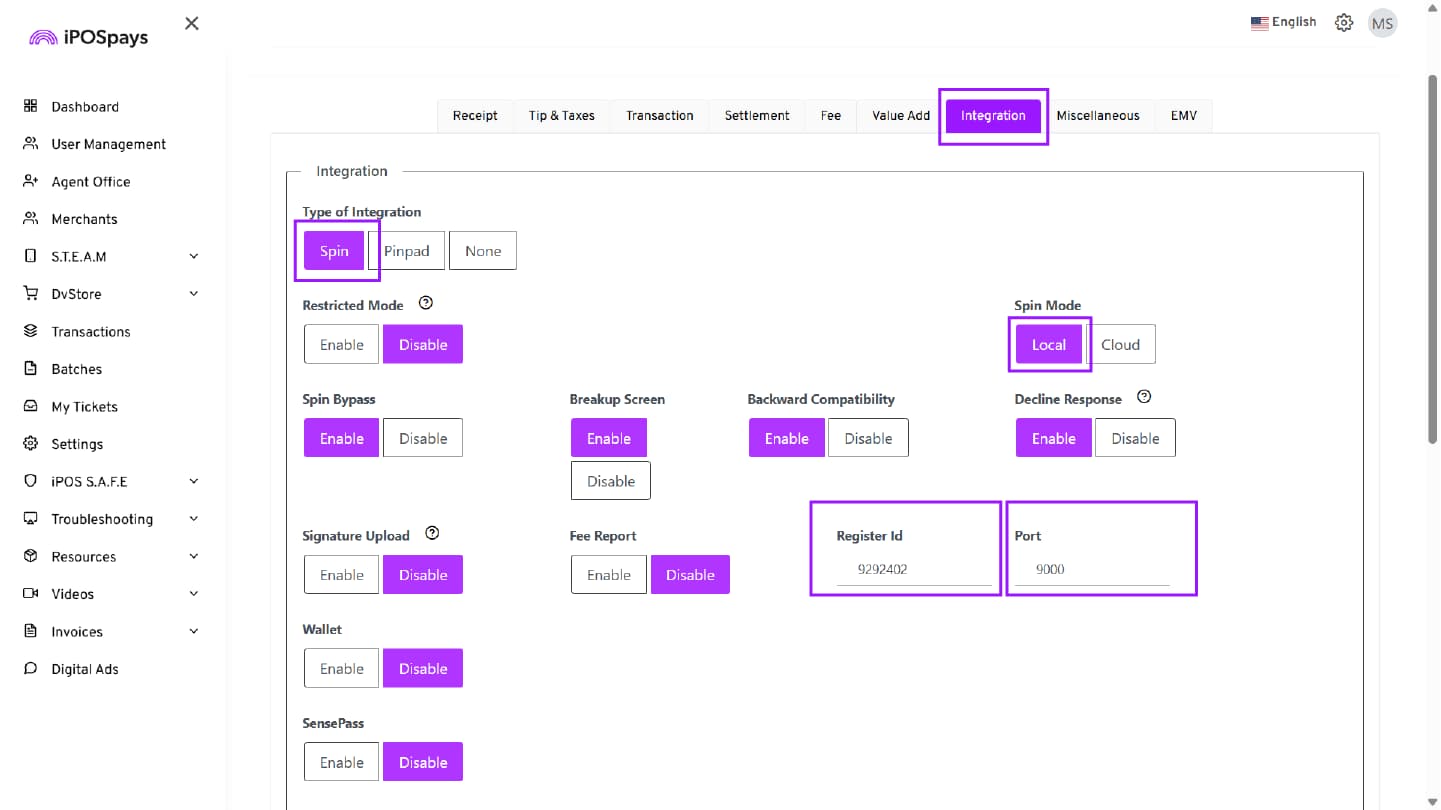
SPIn Local Configuration
-
Select SPIn Local in the Spin Mode.
-
Copy the following details:
-
Register ID
-
Port Number
-
These values are required when sending requests from the Register to the PIN pad.
SPIn Cloud Configuration
-
Select SPIn Cloud in the SPIn Mode.
-
Copy the following details:
-
Register ID
-
Auth Key
-
These values are required when sending requests from the Register to the PIN pad.
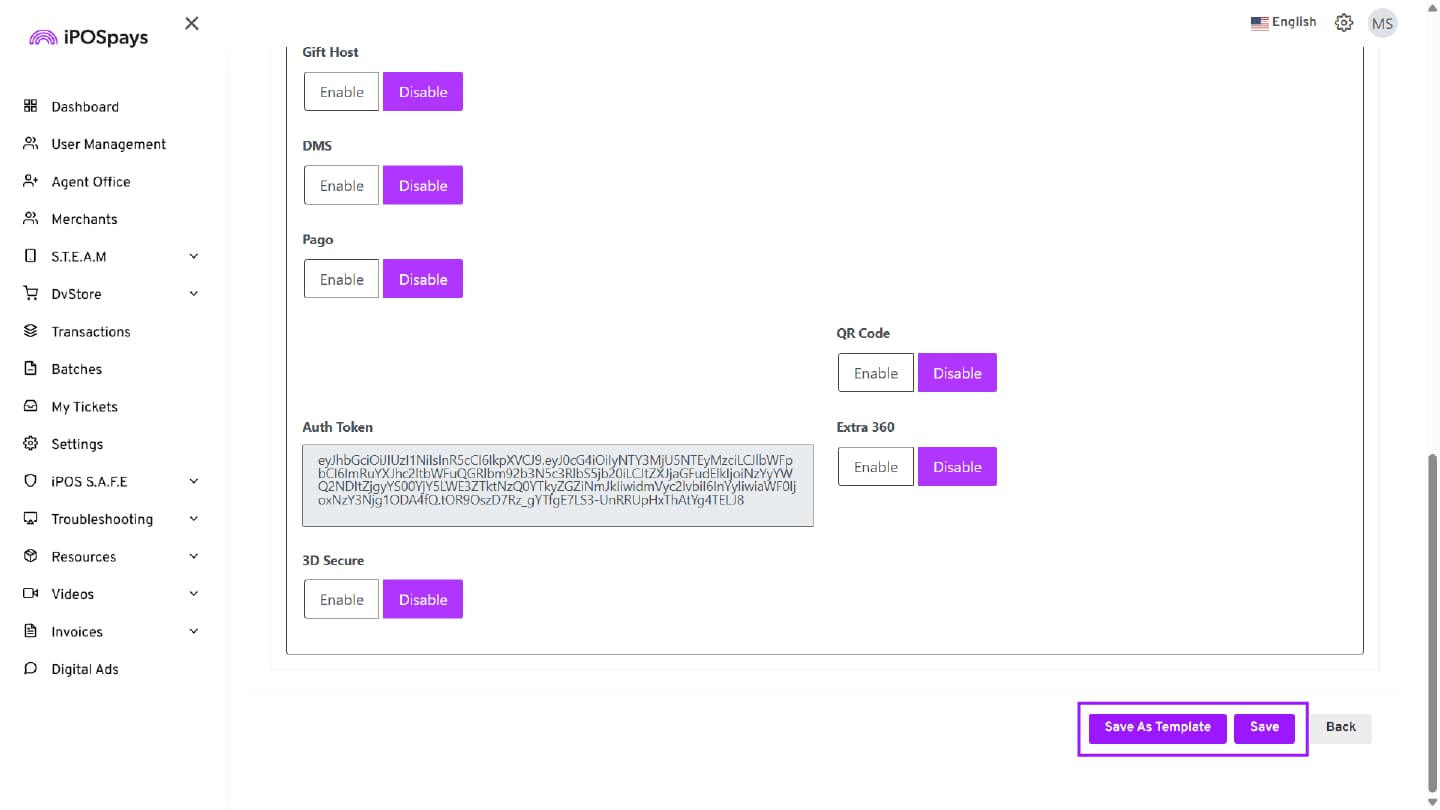
Step 4: Save the Configuration
Once you have configured the required parameters, you have two options:
-
Save → Applies the current parameter configuration directly to the selected TPN.
-
Save as Template → Saves the current parameter configuration as a reusable template.
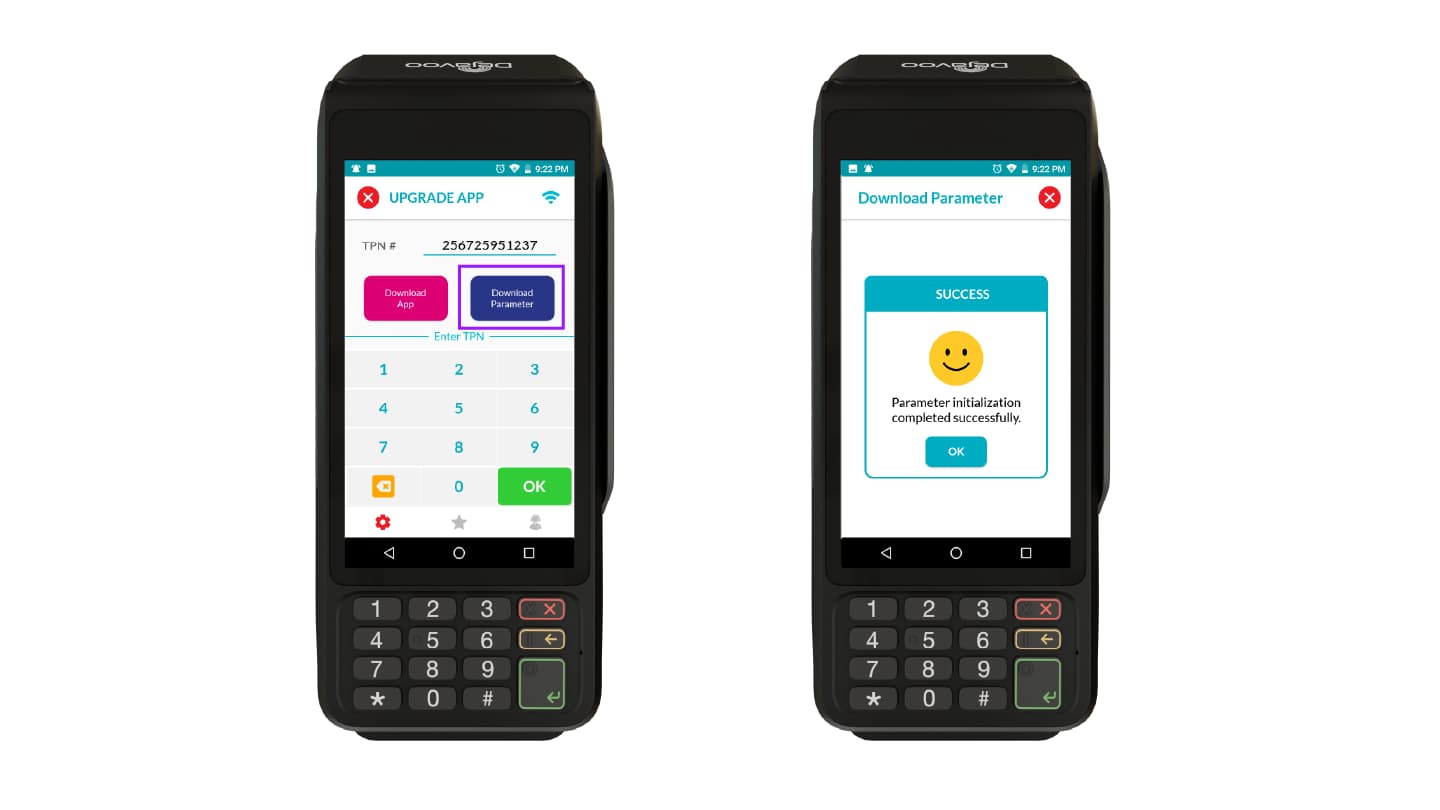
Download Parameters on the PIN pad
After enabling Spin Local or Spin Cloud, download the parameters on the terminal
-
Enter the SPIn-enabled CloudPOS TPN on the PIN pad terminal.
-
Perform a Parameter update on the device by clicking Download Parameter.
-
A SUCCESS prompt will appear on the device.
-
Tap OK to proceed.
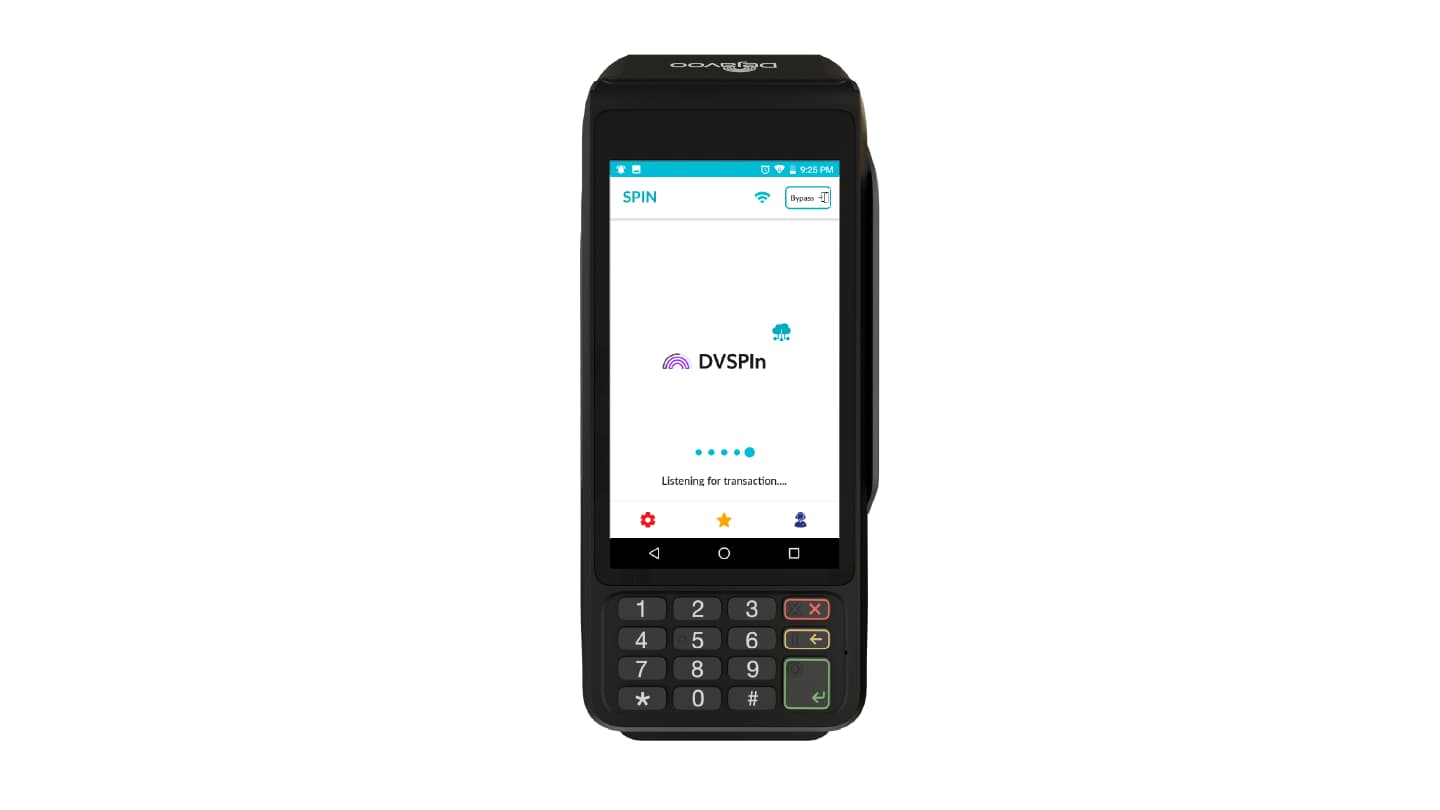
The PIN pad is now successfully integrated with the Register.
Configure the Register using the credentials based on the selected SPIn mode:
-
If Spin Local is enabled, enter the Register ID and Port Number in the Register.
-
If Spin Cloud is enabled, enter the Register ID and Auth Key in the Register.
-
Enter the transaction amount on the Register and click Submit.
-
Once the configuration is complete, the Register is ready to send transaction requests to the PIN pad.
The entered amount is automatically transmitted to the integrated PIN pad, allowing the customer to proceed with the payment. After the transaction is completed on the PIN pad, the transaction status is sent back and displayed on the Register.
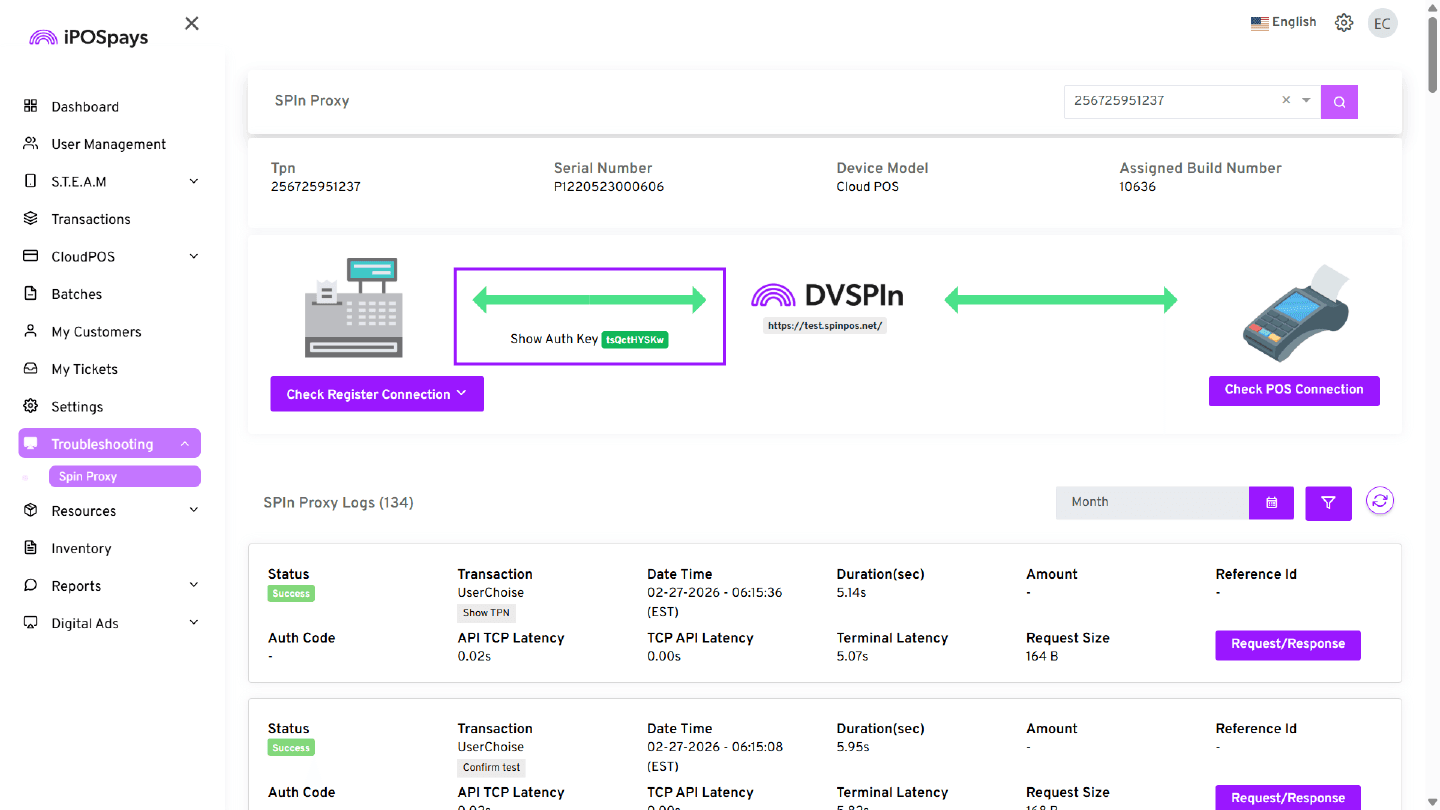
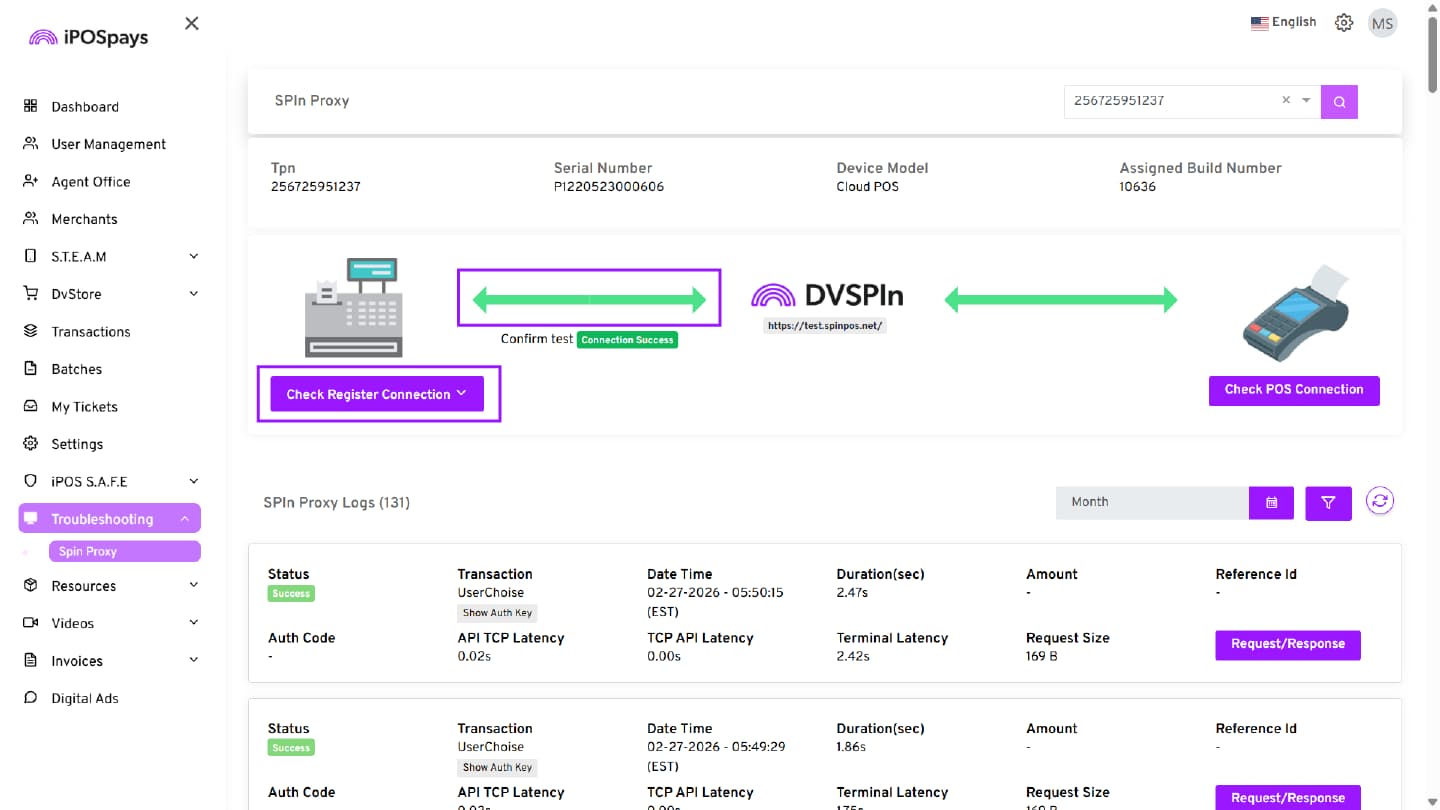
SPIn Proxy (Troubleshooting)
SPIn proxy helps integrators ensure that the connection between SPIn and the payment terminal is established.
-
Log in to the iPOSpays portal using ISO or Merchant credentials (available for both ISO and merchants).
-
Navigate to Troubleshooting and select Spin Proxy.
-
Enter the SPIn-enabled CloudPOS TPN in the search box.
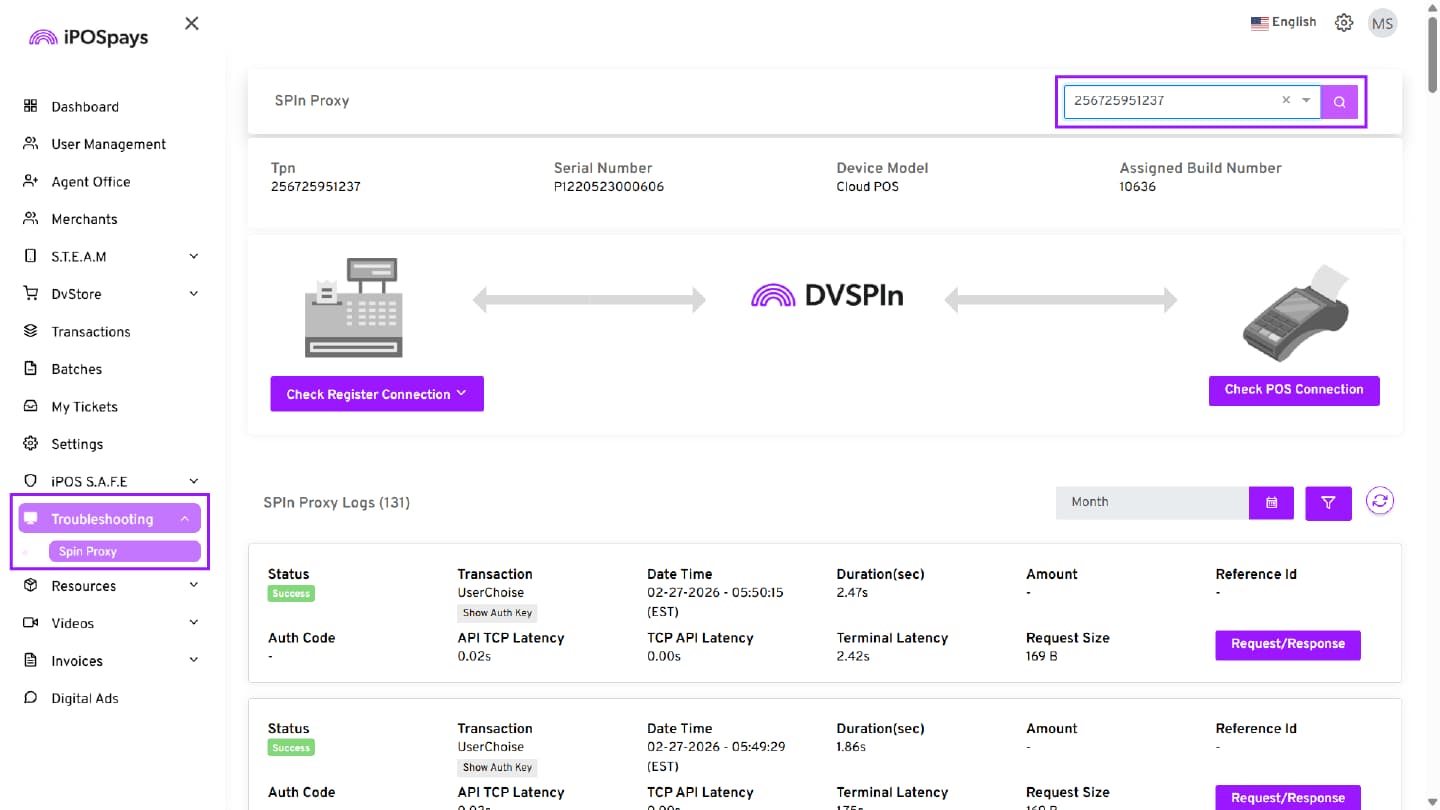
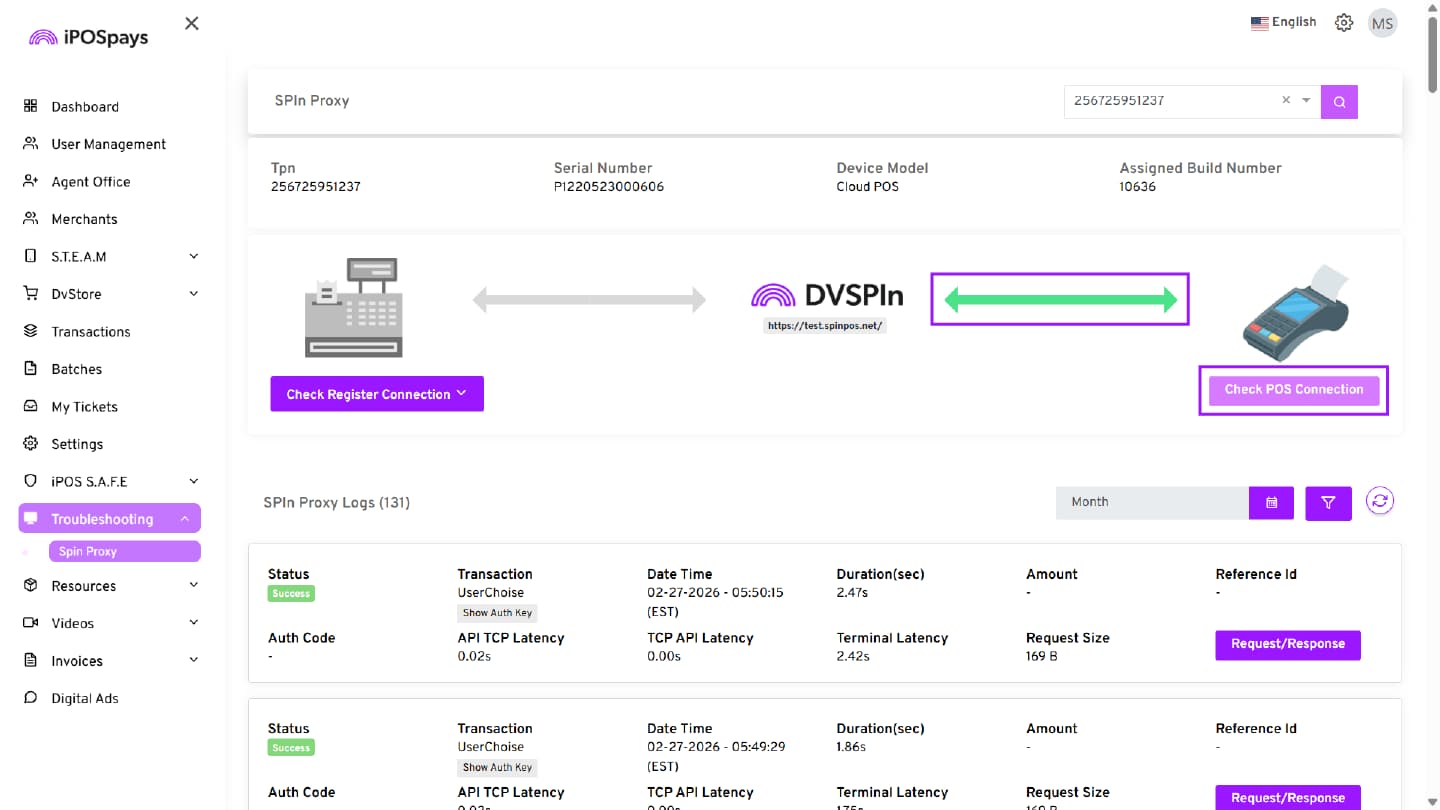
- Click Check POS Connection.
Verify the connection:
-
If the arrow between the SPIn logo and the payment terminal logo is lit up in green, it indicates that the connection has been successfully established.
-
If the arrow is lit up in red, it means the connection has not been established, and there is an issue.
If the connection fails, contact Dejavoo Support at support@dejavoo.io
Simulated testing lets integrators verify if the generated Auth Key and TPN are working and ready to be configured with the Host System.
TPN & Auth Key Check – Short Steps:
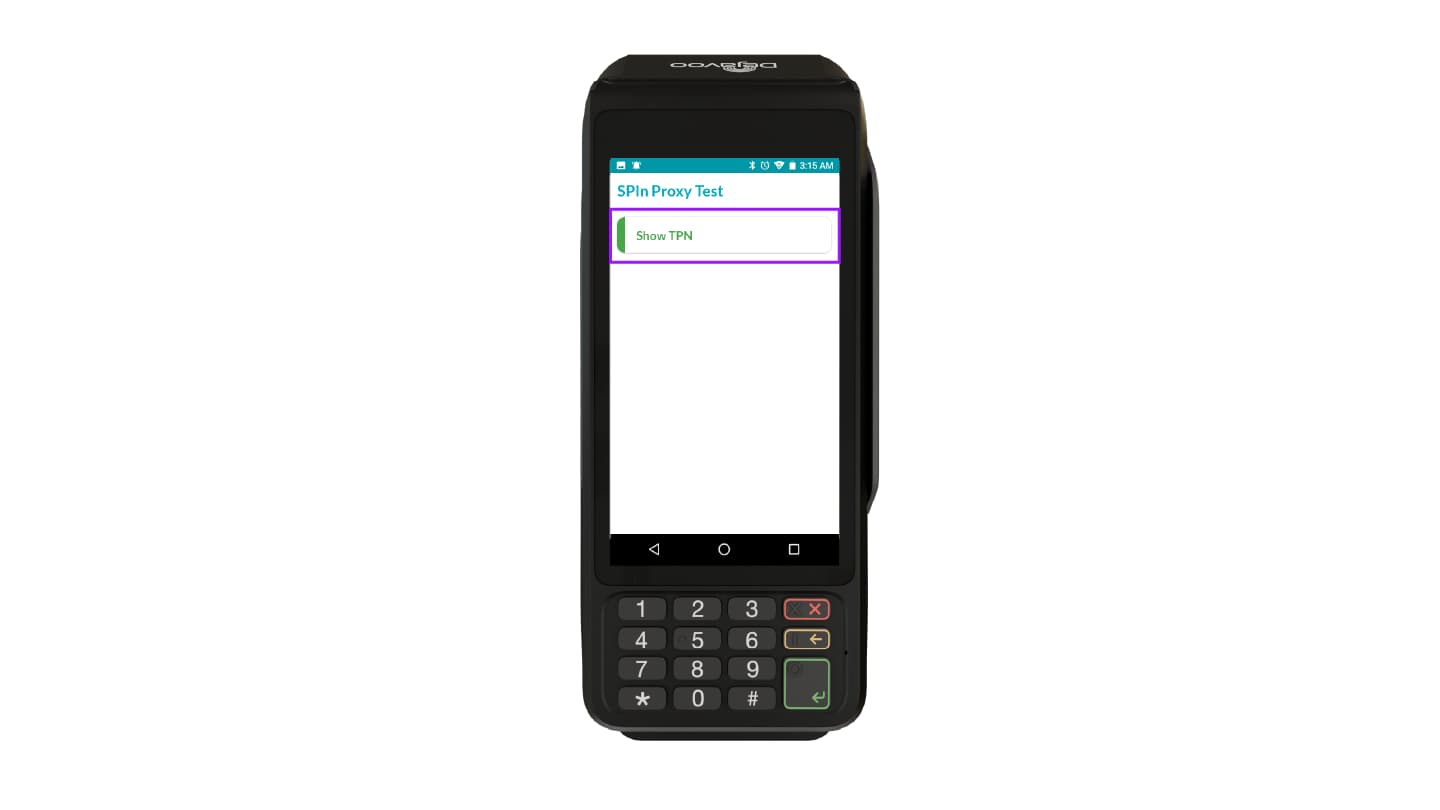
TPN Check: Click “Check Register Connection” and select “Show TPN.”
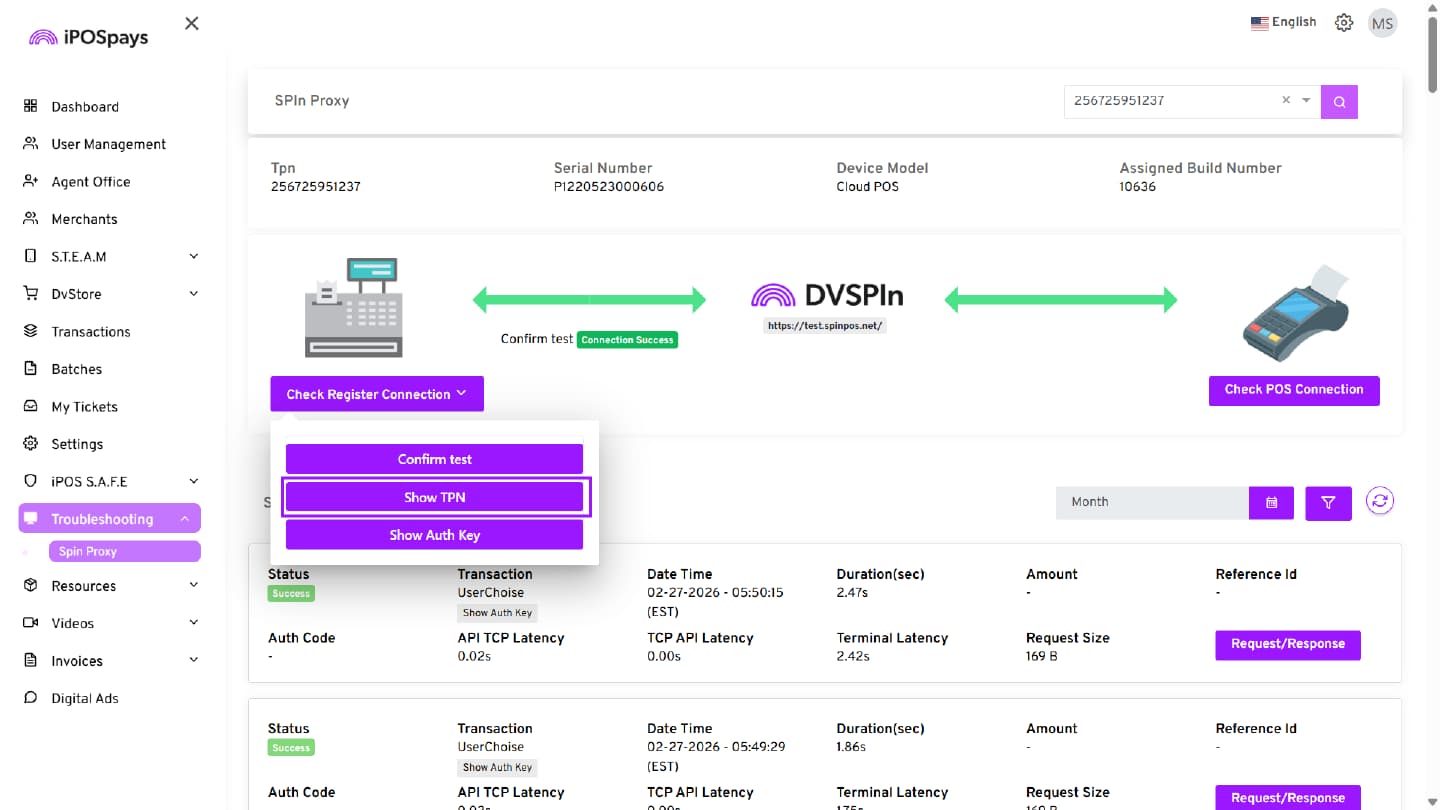
- Confirm the pop-up on the terminal.
Verify the connection:
-
If the arrow light is green, the TPN will appear on the portal, indicating a successful connection.
-
If the arrow light is red, the connection has failed.
If the connection fails, contact Dejavoo Support at support@dejavoo.io
Auth Key Check:
- Click “Check Register Connection” and select “Show Auth Key.”

- Confirm the pop-up on the terminal.
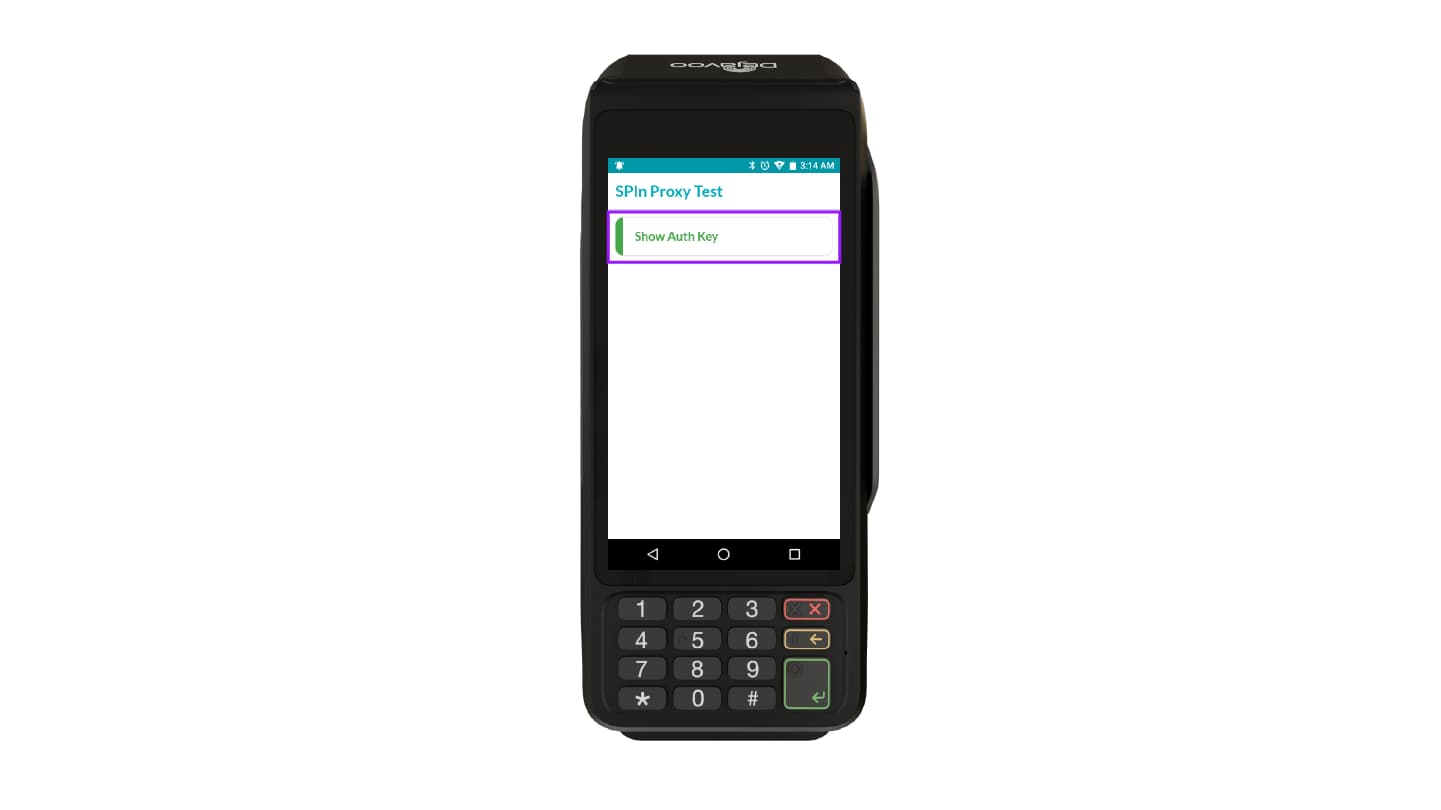
Verify the connection:
-
If the arrow light is green, the Auth Key will appear on the portal, indicating a successful connection.
-
If the arrow light is red, the connection has failed.
If the connection fails, contact Dejavoo Support at support@dejavoo.io